Translating a rangoli design from idea to reality can seem daunting. However, the process is quite simple when you break it down into manageable steps. With some planning, the right materials, and a systematic approach, even beginners can learn how to craft beautiful rangoli floor art.
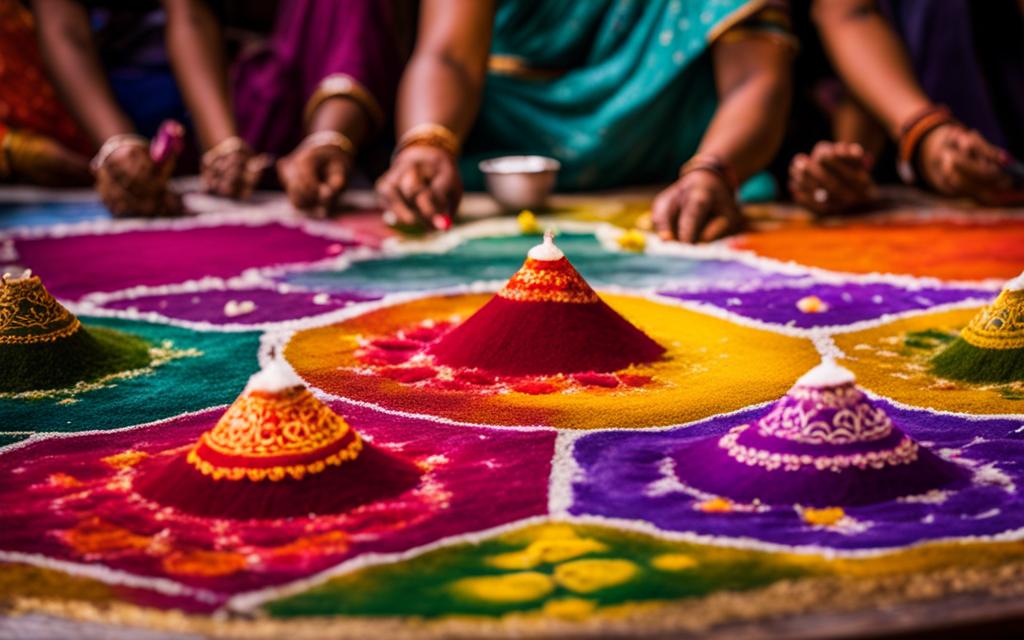
Table of Contents
- 1 How To Make Rangoli Designs Step By Step On Floor – Quick Steps
- 2 Select a Pattern
- 3 Gather Your Supplies
- 4 Prepare Your Workspace
- 5 Mark the Outline
- 6 Fill Step-by-Step
- 7 Enhance Details
- 8 Perfect the Finishing Touches
- 9 Conclusion – How To Make Rangoli Designs Step By Step On Floor
- 10 FAQ – How To Make Rangoli Designs Step By Step On Floor
How To Make Rangoli Designs Step By Step On Floor – Quick Steps
- Choose simple starter designs
- Use tools for symmetry
- Work slowly in segments
- Refine with ornamental accents
- Finesse all final imperfections
Now transform empty spaces into beautiful rangoli works of art.
Select a Pattern
Browse books and online galleries to decide what rangoli motif inspires you. Choose a design that excites you yet aligns with your skill level. Geometric shapes or floral motifs work well for first-timers. Have a reference image handy.
Gather Your Supplies
You’ll need these basic rangoli-making supplies:
- Rangoli stencils & templates
- White & coloured rangoli powder
- Containers to store the powder
- Rangoli cone with nozzle tips
- Soft brush for cleaning
- Outlining materials like chalk or flour dough
Prepare Your Workspace
Choose an open floor area to work on like the entranceway, living room, or courtyard. Define the layout by taping parchment paper to the floor or placing yardsticks. This frames the base dimensions. Sweep and mop the surface clean beforehand.
Mark the Outline
Use a chalk, pencil or flour dough to lightly sketch guide marks for where key pattern elements will go. This includes delineating individual petals or sections. The outlines bring symmetry and accuracy.
Fill Step-by-Step
Working one section at a time, use your rangoli cone to carefully fill in shapes with colours. Going slowly in stages allows maximum intricacy and theme consistency across repeats. Let areas dry between applications.
Enhance Details
Embellish basic shapes with ornate dots, curves, leaves or other decorative touches using contrasting powders. This further livens up the design. Consider mixed media add-ons too like flower petals.
Perfect the Finishing Touches
Carefully sweep up any major spillage with a soft brush. Gently pat down uneven piles. Stand back to spot gaps in need of touch-ups. Add borders last.
Conclusion – How To Make Rangoli Designs Step By Step On Floor
Follow this systematic approach of planning, marking and gradually building up layers to create dazzling rangoli floor art. Rangoli-making is therapeutic and meditative when you take it step-by-step.
Let patterns come to life under your fingertips. Soon you’ll have mastered making, not just following, captivating rangoli traditions.
>> Also read my other posts:
FAQ – How To Make Rangoli Designs Step By Step On Floor
Q: What type of flooring works best for rangoli making?
A: Smooth, flat flooring like marble, concrete, or terracotta tile allows the best canvas for intricate rangoli. Avoid uneven surfaces.
Q: How do I get a rangoli design to be symmetrical?
A: Lightly outline all the segments first before filling them in. Use yardsticks, chalk lines, and templates to accurately measure/space key elements.
Q: What’s the best way to fix smeared sections?
A: Use a dry paintbrush or feather to gently lift and sweep away excess powder. Pour new powder to cover fixes. Blend gently with fingertips.
Q: Can I make large, complex rangoli as a beginner?
A: Start simpler and smaller. Larger rangoli require more planning, time, supplies and tricky pouring technique. Build up skill level first.
Q: How long does an intricate floor rangoli last?
A: Expect elaborate designs to last 1-2 weeks with care. Simpler or smaller ones may only endure 1-2 days before fading. Take lots of photos.
Q: Is it possible to preserve a rangoli permanently?
A: Not the materials, but professional artists can recreate on canvas to gift or sell. Some also make imprints by gently pressing paper on top.