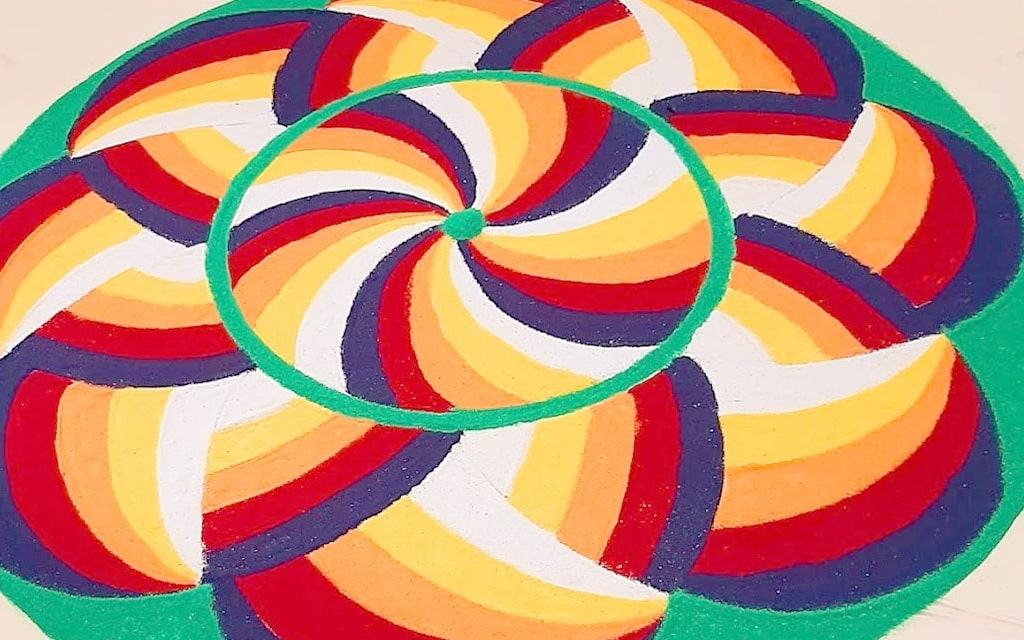
Rangolis traditionally decorate floors during Diwali in stunning yet flat designs. Adding a third dimension transforms patterns, symbols and flowers into vivaciously popping artwork.
Though advanced, mastering the skill of 3D rangoli design brings designs to life with a realistic wow factor.

Cleverly Outlining Depth Areas Plan rangoli area in portions – foreground, mid-ground and background.
Use white powder to faintly section off these planes in a receding format to mimic depth. Keep outlines smooth, with larger front sections and smaller distant areas.
Table of Contents
How To Make 3d Rangoli Designs – Steps at a Glance
- Section off areas into receding depth planes
- Place prominent colours and designs in the forefront
- Soften and blend background elements
- Shade respective areas appropriately
- Use an angled light source to cast shadows
As you master organizing layouts and shading in alignment, 3D rangoli-making prowess will surely follow. This Diwali, imbibe extra dynamism into your floor artistry through this guide.
Strategic colour and Element Placement
Place bright, prominent colours/shapes towards the fore-front outlines, with relatively flatter lighter colours in backgrounds:
✔️ Layered petals overlap outwards
✔️ Central patterns attendance recedes
✔️ Overlapping leaves and lamps create depth
Shading and Details Enhance 3D Effects
Details matter in enhancing realism. Use graduated colour-blending, sharp edges and strategic shading:
- Shade backgrounds darker for stronger pop-out
- Soften edges and gradationally lighten receding objects
- Define edges with thin dark borders on front contours
Ambient Side Lighting
Ampflification Set up focused angled lighting on one side of the rangoli once complete to cast strong shadows. This amplifies the 3D architecture with shapes appearing to rise right off the floor.
Conclusion – How To Make 3d Rangoli Designs
Though challenging initially, the mesmerizing appeal of three-dimensional rangoli art makes all the effort wholly worthwhile. Strategize your depths and details to enable patterns and colours to leap out this Diwali.
>> Also read my other posts:
FAQ – How To Make 3d Rangoli Designs
Q: How many depth levels should I depict in the design?
A: For simplicity, stick to only 2-3 receding planes – foreground, mid-ground and background to start with.
Q: What 3D elements showcase best in rangoli art?
A: Intricately layered flowers, rows of diyas, terraced steps architecture and some geometric shapes translate well into 3D.
Q: What common mistakes should I avoid when shading?
A: Don’t blend colours too uniformly. Allow some texture and irregularities for realism. Also, avoid making backgrounds overly dark.
Q: Is regular lighting fine or do I need specialized equipment?
A: For highlighting 3D effects, use a powerful angular lamp or flashlight held at an angle next to the design.
Q: Can I preserve these intricate rangoli designs?
A: Take lots of clear pictures from multiple angles and distances to capture realistic 3D elements before they fade.
Q: Which areas should I emphasize with borders and definitions?
A: Make sure to sharply outline the front contours and edges of foreground elements so they stand out first.
Q: What makes the designs appear popped-out and voluminous?
A: Strategic colour placement, graduated shading and directional side lighting together create dramatically protruding 3D rangolis.
